Florentine Chain Bracelet
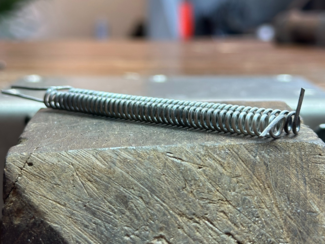
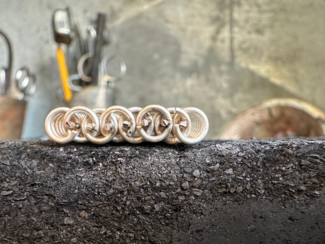
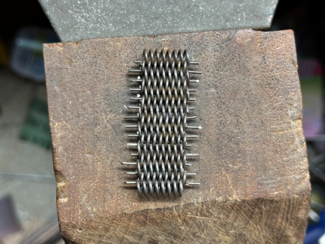
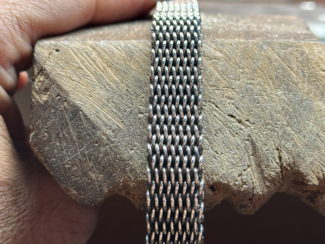
This hands on demo class will take you through the step by step process of creating a Florentine chain. We will see how to create the coils with tricks to space them out and to mount them into this antique beautiful chain. Learn how to transform tools to your need that will help you trough the making process. This class will bring your soldering skill to a new level. On the last session we will focus on the making of a clasp that will enhance your bracelet.
Meet the instructor

Matthieu moved from Paris to New-Mexico when he was 19, where for seven years he studied Navajo, Hopi and Zuni jewelry techniques. He was immediately drawn to stamping, making concho belts and bracelets. He then moved to Mali, West-Africa and worked for a few years with the Fulani, Tuareg and Bambara jewelers.
In 1999, Matthieu settled in Montreal Canada and continued his studies by going to a jewelry school and learning a more classical part of the trade. Over the years, Matthieu has returned to Africa regularly.
In 2014, Tim McCreight and Mattheiu Cheminee created the Toolbox Initiative, a non-profit organization that helps jewelers in West Africa through the gifts of donated tools.
“I have been stamping and making stamps since the beginning and have developed a form of stamping design by creating patterns that fill the entire piece of metal. This is called “tessellation”.
Matthieu has written two books, “Legacy, jewelry techniques of West Africa“, “The Art of Stamping", both published at Brynmorgen Press and Inadan, The Mastery of Tuareg artisans published at Schiffer publishing. A new book will come out in the spring 2025; Chain making for jewelers.
Visit Matthieu's website or instagram page for more info on his work.
Materials & Tools
The following supplies will be used for course demonstration and objectives. A suggested item and/or vendor has been provided below for reference. Click the vendor name to be redirected to a page where you can view the item. The quantities needed for each item are listed first. If ordering, please be aware that some items may come in larger quantities than needed for this class. We recommend not opening an item's packaging until the day of the workshop. Student participation during or in-between class sessions is not required - observers are welcome.
Metal/raw materials:
1 set x round mandrel (we’ll be using size 3.4mm) (Amazon)
Wire:
- Sterling Silver wire ,19 gauge (0,9mm thick), about 26" for a 7 " bracelet (Rio Grande)
- Sterling Silver wire, 17 gauge (1,1mm thick), 6" (Rio Grande)
Sheet:
- Sterling Silver sheet, 20 gauge (0,8mm thick) 2"X2 (Rio Grande)
Sterling Silver sheet, 12 gauge (1,5mm thick) 1"X1" (Rio Grande)
Tubing (Heavy Walled):
Sterling Silver tube: (2mm outside diameter, wall 0,5mm) 2" (Rio Grande)
Solder: hard and medium (Rio Grande)
Torch setup:
1 x fireproof area - steel sheet, tiles, etc. (Amazon or Home Depot)
1 x compressed charcoal block - hard (Rio Grande)
1 x torch - Smith mini, Silversmith, or butane (Rio Grande or Rio Grande)
1 x #0 or #1 torch tip - if getting Silversmith (Rio Grande)
1 x striker or lighter - Silversmith system has one (Rio Grande)
1 x soldering tweezers (Rio Grande)
1 x soldering pick (Rio Grande)
1 x 3rd arm (Rio Grande)
1 x cross lock tweezers (Rio Grande)
1 x paste flux (Rio Grande)
1 x copper tongs - for pickle (Rio Grande)
1 x 6” silver solder - medium (Rio Grande)
1 x pickle - sodium bisulfate or citric acid (Rio Grande or Amazon)
1 x crock pot or lidded glass container (Rio Grande or Amazon)
1 x tempered glass container or sink - for quenching and rinsing
1 x small brush - for flux
Hand tools:
1 x round nose pliers (Rio Grande)
1 x chain nose pliers (Rio Grande)
1 x flat nose pliers (Rio Grande)
1 x snips / flush cutters (Rio Grande)
1 x jewelers saw (Rio Grande)
1 x pack saw blades - 2/0 (Rio Grande)
1 x burlife / bee's wax (Rio Grande)
1 x bench pin (Rio Grande)
1 x half round hand file - #2 cut (Rio Grande)
1 x half round forming pliers (Rio Grande)
1 x rawhide / plastic mallet (Rio Grande)
1 x steel block / steel surface (Rio Grande)
1 x small steel ruler (Rio Grande)
1 x sheet of sand paper - 220 to 600 grits (Rio Grande)
1 x calipers (Rio Grande)
1 x dividers (Rio Grande)
1 x sanding sticks (Rio Grande)
1 x parallel pliers (Rio Grande)
1 x brass hammer (Rio Grande)
1 x ring mandrel (Rio Grande)
1 x bracelet mandrel (Rio Grande)
1 x vise (Rio Grande)
Other/miscellaneous items:
hard work surface
fan and open window - or ventilation system
safety glasses
pencil, Sharpie, notebook
rags/towels


