Carving Techniques for Gold and Silver
To see more of Tom's work, please visit his website sevenfingers.com.
Meet the instructor

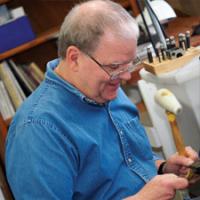
Since he was a boy, Tom Herman has been an artist. In 1982, he channeled his artistic talents into his new business, Seven Fingers Jewelers, named for his own handprint after having lost three fingers as a child in a Minnesota farming accident. Over the last 30 years, Tom has become a master jewelry maker, renowned for his talents at working with precious stones, metal carving, and unique designs.
Tom's timeless pieces are inspired by organic forms and geometric balance. In designs that centerpiece precious stones, Tom begins by searching through piles of opals, agates, or other precious materials to find unique stones that, in his words, "are able to take on a greater meaning". With this vision, Tom cuts each stone and frames it in a way to bring out its natural beauty.
Not all Tom's pieces focus on precious stones; his precious metal carving is spectacular enough to stand alone. Some of his most popular carvings, including laurel, oak, and ginkgo leaves, have been rendered in earrings, rings, cufflinks, brooches, and bracelets. Throughout his work, Tom has cultivated his talents and created pieces of art that will be worn and admired for many generations to come.
Materials & Tools
A materials kit for this course, estimated at $50 is payable to the instructor on the first day. It includes: steel for holding your work, Thermo-Lock, high-carbon steel for making your own chasing tools, gravers and handles, and copper for making your sample. Tom will also have additional items available for purchase, provided by AllCraft. These include: Japanese chasing punch blanks, chasing hammers, and additional saw blades
- Designs you want to make
- Saw Blades: 6/0 is best, but 4/0 and 8/0 are handy (A LOT)
- Needle Files
- Small Chasing Hammers – very light & lighter (some available at class, but if you have a small one, it is ideal)
- Sanding stick-for smoothing up the punches
- Bur assortment
- Assortment of Gravers (whatever you have)
- Copper is provided in the materials kit. Students can bring additional metal if they would like. Nickel silver, Sterling silver, 50/50 copper/silver, 18K gold, bronze, "Nu-gold" or the equivalent, are all acceptable. NO brass – it is too flaky. If you want to make a ring, please prepare one in advance with the preferred metals in a gauge at least 1.5 mm in thickness (Tom usually uses 2mm thick). Students may also bring castings of their own work that they would like to clean up, as well as gems that they want to design around.
It is recommended that students bring any tools that they own that are required for this process. Whereas Metalwerx has a limited number of the following items to share during the workshop, it is best to get comfortable with this process using the your own tools from the beginning, if possible.
- Saw Frame – a small narrow frame is best
- Dividers
- Sharpening stone
- Large bastard file-for filing steel punches-this file can't be too big
- Small Drill bit assortment (Suggested #77,76 (several of each) with collet with 3/32 shaft if you want to do fine piercing)
- Files assortment
- Large pin vice or vise grips –for holding punches while filing and hardening
- Ball vise


